Red velvet cupcakes
Few desserts carry the same timeless appeal and elegance as red velvet cupcakes. With their vibrant red color, delicate cocoa flavor, and soft, velvety texture, these cupcakes have become a beloved treat for birthdays, weddings, holidays, and special occasions. Their flavor profile is a unique combination of mild chocolate and subtle tanginess, enhanced by a smooth, rich frosting that brings everything together.
But what makes red velvet cupcakes so special? Unlike standard chocolate or vanilla cupcakes, red velvet has a distinctive taste and texture that comes from the reaction between cocoa powder, vinegar, and buttermilk. The addition of red food coloring or natural alternatives like beet juice gives them their signature hue. When topped with a luscious cream cheese frosting or buttercream, each bite melts in your mouth, creating a perfect balance of flavors.
Red velvet cupcakes are often associated with Southern baking traditions, and their origins can be traced back to the early 1900s. Some historians believe they were first made famous by the Waldorf-Astoria Hotel in New York, while others argue they gained popularity in the South, where buttermilk was a staple ingredient in many baked goods. Regardless of their origin, these cupcakes have cemented their place as one of the most iconic and beloved desserts in the world.
In this guide, we’ll walk through everything you need to know to bake the perfect red velvet cupcakes from scratch. From selecting the right ingredients and mastering the baking process to troubleshooting common issues and experimenting with creative variations, you’ll have all the tools to make bakery-quality cupcakes right in your kitchen.
Why Red Velvet Cupcakes Stand Out
The beauty of red velvet cupcakes lies in their complexity—they are neither a full chocolate nor vanilla cupcake but exist in a category of their own. While they contain cocoa powder, they do not have the deep richness of a chocolate cupcake. Instead, they have a mild cocoa taste with a hint of tanginess from buttermilk and vinegar.
The texture of red velvet cupcakes is another key feature that sets them apart. They are exceptionally soft, tender, and moist, thanks to the acidic ingredients that react with the baking soda to create a delicate crumb structure. The velvety name isn’t just for show—when made correctly, red velvet cupcakes have a melt-in-your-mouth feel that’s hard to resist.
Another aspect that makes red velvet cupcakes unique is the frosting. Traditionally, red velvet cake was topped with a cooked flour-based frosting called ermine frosting, but today, the most popular option is cream cheese frosting, which complements the cake’s subtle chocolate flavor beautifully.
Whether you’re making red velvet cupcakes for a holiday celebration, a romantic Valentine’s Day treat, or simply to satisfy a craving, this recipe is sure to impress.
The Science Behind Red Velvet Cupcakes
Understanding the science of baking can help you achieve the perfect red velvet cupcake every time. Unlike basic vanilla or chocolate cupcakes, red velvet requires a careful balance of acidity, leavening agents, and moisture to create its signature texture and flavor.
1. The Role of Cocoa Powder
Red velvet cupcakes contain a small amount of cocoa powder, typically around 1-2 tablespoons per batch. While this may seem minimal, it provides a subtle chocolate undertone that enhances the overall flavor. Traditionally, natural cocoa powder was used, which has a slightly acidic pH, contributing to the cake’s soft texture.
2. The Importance of Buttermilk and Vinegar
Acidic ingredients play a crucial role in red velvet cupcakes, giving them their signature tangy flavor and soft texture. Buttermilk and vinegar react with baking soda, helping the cupcakes rise while keeping them light and fluffy.
- Buttermilk adds richness and moisture, preventing the cupcakes from being dry.
- Vinegar enhances the red color by reacting with cocoa powder’s natural anthocyanins, intensifying the cupcake’s vibrancy.
3. The Magic of Baking Soda and Baking Powder
Red velvet cupcakes rely on both baking soda and baking powder for leavening. The reaction between the acidic ingredients and the baking soda creates carbon dioxide bubbles, leading to a tender, airy crumb. Baking powder provides additional lift, ensuring the cupcakes rise evenly.
4. How to Achieve the Perfect Red Color
The bright red color of red velvet cupcakes originally came from the reaction between natural cocoa powder and acidic ingredients. However, modern versions often use red food coloring to enhance the vibrancy. There are several options for achieving the ideal red hue:
- Liquid Food Coloring: The most common option but may require a larger amount.
- Gel Food Coloring: Provides a more concentrated color with less liquid.
- Powdered Food Coloring: Great for maintaining texture without adding excess liquid.
- Beetroot Juice or Powder: A natural alternative for a subtle red hue.
If you prefer a deeper red, you can add a tiny bit of brown food coloring to create a richer shade without making the cupcakes appear artificial.
Essential Tools and Equipment for Making Red Velvet Cupcakes
Before you start baking, having the right tools can make the process smoother and ensure consistent, high-quality results.
1. Cupcake Pan and Liners
A 12-cup muffin tin is standard for baking cupcakes. Using cupcake liners prevents sticking and makes for easy cleanup.
2. Mixing Bowls
You’ll need at least two mixing bowls—one for dry ingredients and another for wet ingredients.
3. Electric Mixer or Hand Whisk
A stand mixer or hand mixer makes creaming butter and sugar easier, ensuring a light and fluffy texture. If mixing by hand, use a sturdy whisk and spatula.
4. Measuring Cups and Spoons
Accurate measurements are crucial in baking, so use proper measuring cups and spoons for consistency.
5. Sifter or Fine Mesh Strainer
Sifting flour, cocoa powder, and baking soda prevents lumps and ensures even distribution.
6. Spatula and Whisk
A rubber spatula helps fold ingredients without overmixing, while a whisk ensures smooth batter consistency.
7. Cooling Rack
Cupcakes should cool completely on a wire rack before frosting to prevent the frosting from melting.
8. Piping Bags and Tips
If you want a professional bakery-style look, use a piping bag and decorative tips to create beautiful swirls of frosting.
Choosing the Best Ingredients for Red Velvet Cupcakes
Flour Selection
- All-Purpose Flour: Works well but may create a denser texture.
- Cake Flour: Provides a lighter, more delicate crumb.
Sweeteners
- Granulated Sugar: The best option for structure and sweetness.
- Brown Sugar: Adds a hint of molasses for extra depth.
Fat Choices
- Butter: Adds richness and a tender texture.
- Oil: Provides moisture, making cupcakes softer for longer. Some recipes combine butter and oil for the best of both worlds.
Eggs
- Eggs help bind the ingredients and contribute to structure. Use room temperature eggs for better incorporation.
Dairy Choices
- Buttermilk is essential for the soft texture and slight tang. If you don’t have buttermilk, mix 1 cup of milk with 1 tablespoon of vinegar or lemon juice and let it sit for 5 minutes.
Red velvet cupcakes are a combination of science, art, and tradition, making them one of the most rewarding desserts to bake. With the right balance of acidity, sweetness, and moisture, these cupcakes achieve a velvety soft crumb and a stunning red hue.
The Best Frostings for Red Velvet Cupcakes
The right frosting can enhance the flavor and texture of your red velvet cupcakes. Traditionally, red velvet cake was topped with a light and creamy ermine frosting, but today, the most popular choice is cream cheese frosting. However, there are many delicious alternatives to consider.
1. Classic Cream Cheese Frosting
The rich tanginess of cream cheese frosting perfectly balances the slight cocoa flavor and sweetness of red velvet cupcakes.
Ingredients for the Perfect Cream Cheese Frosting:
- 8 oz cream cheese, softened
- ½ cup unsalted butter, softened
- 2 ½ cups powdered sugar
- 1 teaspoon vanilla extract
Tips for Making It Perfect:
- Use full-fat cream cheese for the creamiest texture.
- Beat the cream cheese and butter until smooth before adding powdered sugar.
- Sift the powdered sugar to avoid lumps.
- Refrigerate for 15 minutes before piping if the frosting is too soft.
2. Vanilla Buttercream Frosting
For a sweeter, classic frosting, vanilla buttercream is a great alternative. It’s lighter in texture and allows the red velvet flavor to shine through.
How to Make Vanilla Buttercream:
- 1 cup unsalted butter, softened
- 3 ½ cups powdered sugar
- 1 teaspoon vanilla extract
- 2 tablespoons heavy cream
Whip the ingredients together until light and fluffy. Add more cream for a softer texture or more sugar for a stiffer consistency.
3. Chocolate Buttercream Frosting
For those who love a richer, more indulgent twist, chocolate buttercream is a delicious complement to red velvet cupcakes.
Ingredients for Chocolate Buttercream:
- 1 cup unsalted butter, softened
- 3 cups powdered sugar
- ½ cup cocoa powder
- 2 tablespoons milk or cream
- 1 teaspoon vanilla extract
Beat until smooth and creamy. The chocolate brings out the subtle cocoa notes in the red velvet cupcakes.
4. Whipped Cream Frosting
If you prefer a lighter, less sweet frosting, whipped cream frosting is a great alternative. It’s airy and fluffy, making the cupcakes feel light and delicate.
How to Make Whipped Cream Frosting:
- 2 cups heavy cream, chilled
- 3 tablespoons powdered sugar
- 1 teaspoon vanilla extract
Whip until soft peaks form, then pipe onto cooled cupcakes. Serve immediately for best texture.
5. White Chocolate Cream Cheese Frosting
For an elegant, slightly sweeter twist, adding white chocolate to cream cheese frosting creates a silky, luxurious topping.
How to Make White Chocolate Cream Cheese Frosting:
- 8 oz cream cheese, softened
- ½ cup unsalted butter, softened
- 2 ½ cups powdered sugar
- 4 oz white chocolate, melted and cooled
- 1 teaspoon vanilla extract
The white chocolate enhances the richness while maintaining the tanginess of traditional cream cheese frosting.
Red Velvet Cupcake Variations – Fun Ways to Personalize Your Cupcakes
1. Gluten-Free Red Velvet Cupcakes
To make gluten-free red velvet cupcakes, substitute all-purpose flour with a gluten-free flour blend that contains xanthan gum for structure.
Tips for the Best Gluten-Free Cupcakes:
- Use almond flour or coconut flour for a unique twist.
- Add an extra egg to help maintain moisture.
- Let the batter rest for 10 minutes before baking to prevent grittiness.
2. Vegan Red Velvet Cupcakes
For a dairy-free and egg-free version, substitute buttermilk and eggs with plant-based alternatives.
How to Make Vegan Red Velvet Cupcakes:
- Use almond milk mixed with apple cider vinegar instead of buttermilk.
- Replace eggs with flaxseed meal mixed with water.
- Swap vegan butter or coconut oil for traditional butter.
3. Sugar-Free or Keto Red Velvet Cupcakes
For a low-carb, sugar-free version, use almond flour and a sugar substitute.
Key Adjustments:
- Erythritol or monk fruit sweetener instead of sugar.
- Almond flour or coconut flour instead of all-purpose flour.
- Coconut oil instead of butter for extra moisture.
4. Red Velvet Cupcakes with Fillings
Adding a surprise filling inside your cupcakes can make them even more special.
Filling Ideas:
- Cream Cheese Filling: A hidden cream cheese center for an extra tangy bite.
- Raspberry or Strawberry Jam: A burst of fruitiness that complements the red velvet flavor.
- Chocolate Ganache: For chocolate lovers, a rich ganache filling adds decadence.
To fill the cupcakes, use a small spoon or piping bag to remove a bit of the center and add the filling before frosting.
5. Mini Red Velvet Cupcakes
For bite-sized treats, make mini cupcakes instead of full-sized ones.
Baking Adjustments:
- Reduce baking time to 10-12 minutes.
- Use mini cupcake liners for an elegant look.
- Pipe frosting with a small round tip for perfect proportions.
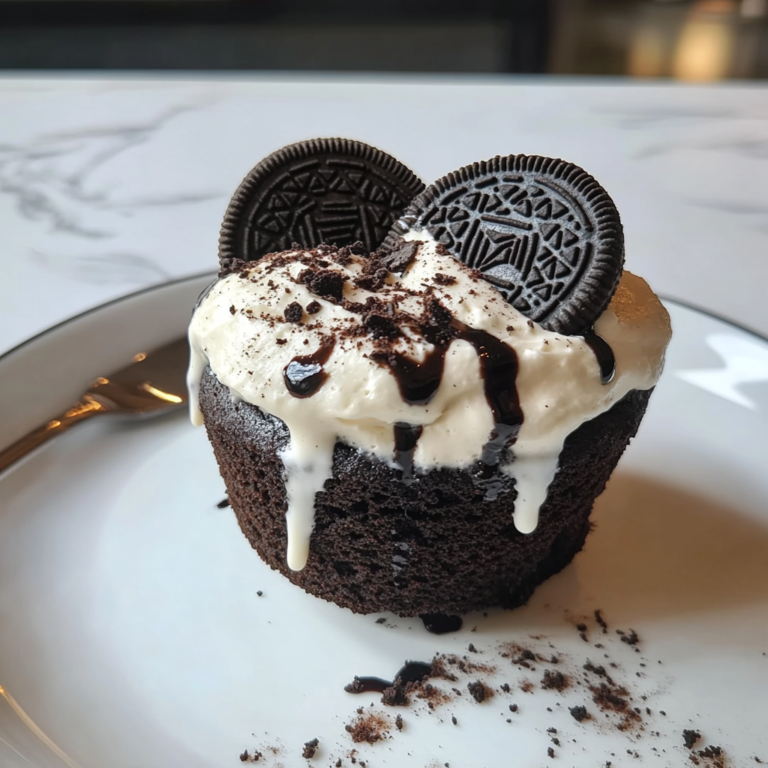
6. Red Velvet Cupcakes with a Cookie Crust
For a unique twist, add a cookie crust layer at the bottom of each cupcake.
How to Add a Cookie Crust:
- Crush Oreo cookies or graham crackers.
- Mix with melted butter and press into cupcake liners before adding the batter.
- Bake as usual for a crispy base with a soft cupcake on top.
Decorating and Presentation Ideas for Red Velvet Cupcakes
1. Classic Piping Techniques
- Swirls and Rosettes: Use a large round or star tip for smooth swirls.
- Double Swirl: Use two colors of frosting in one piping bag for a beautiful effect.
- Tall Peaks: Pipe in a circular motion for a bakery-style look.
2. Edible Toppings and Garnishes
- Red Velvet Crumbs: Crumble a spare cupcake and sprinkle the crumbs over the frosting.
- Chocolate Shavings or Chips: Adds a rich contrast to the sweetness.
- Fresh Berries: Strawberries or raspberries provide a tart balance.
- Sprinkles and Glitter: Perfect for festive occasions.
3. Seasonal Red Velvet Cupcake Ideas
- Valentine’s Day: Shape frosting into hearts or add edible rose petals.
- Christmas: Add red and green sprinkles or a peppermint stick.
- Halloween: Use black cocoa frosting for a spooky look.
Red velvet cupcakes are a classic dessert that can be customized in endless ways. Whether you prefer traditional cream cheese frosting, fun mix-ins, or creative decorations, these cupcakes can be tailored to any occasion and taste preference.
Troubleshooting Common Red Velvet Cupcake Problems
Even when following a trusted recipe, things don’t always go as planned. If your cupcakes aren’t turning out quite right, these solutions will help you fix mistakes and prevent them in the future.
1. Cupcakes Are Brown Instead of Red
One of the most frustrating issues is when red velvet cupcakes lose their vibrant color during baking and turn brown or dull.
Possible Causes:
- Using too much cocoa powder—too much chocolate overpowers the red hue.
- Not enough food coloring—if using liquid food coloring, you may need more than expected.
- Using Dutch-processed cocoa powder instead of natural cocoa, which affects acidity and color retention.
- Oven temperature too high, causing the color to darken.
Solutions:
- Use natural cocoa powder (not Dutch-processed) for the best color reaction.
- Increase red food coloring—gel or powder works better than liquid.
- Lower oven temperature slightly and bake longer to prevent excessive browning.
- If using beet juice or natural coloring, add a teaspoon of lemon juice or vinegar to help stabilize the red pigment.
2. Cupcakes Are Too Dry or Dense
A perfect red velvet cupcake should be moist, fluffy, and tender. If your cupcakes turn out dry, dense, or heavy, something went wrong in the mixing or baking process.
Possible Causes:
- Overmixing the batter, which develops too much gluten, making the cupcakes dense.
- Not enough fat or liquid, causing dryness.
- Overbaking, which removes moisture.
- Not using buttermilk—the acidity and moisture of buttermilk are crucial.
Solutions:
- Mix the batter gently—stop as soon as the flour is incorporated.
- Use butter and oil together—butter adds flavor, while oil keeps cupcakes moist.
- Make sure your oven temperature is accurate—use an oven thermometer to prevent overbaking.
- Add an extra tablespoon of buttermilk for a softer texture.
3. Cupcakes Didn’t Rise Properly
If your cupcakes are flat, sunken, or lopsided, the leavening process might have gone wrong.
Possible Causes:
- Expired baking soda or baking powder, preventing a proper rise.
- Incorrect ratio of vinegar and baking soda, leading to weak leavening.
- Opening the oven door too soon, causing cupcakes to collapse.
Solutions:
- Always check expiration dates on baking soda and baking powder.
- Use the correct amount of vinegar—too much or too little disrupts the reaction.
- Bake at a consistent temperature and avoid opening the oven door in the first 15 minutes.
4. Frosting is Too Runny or Won’t Hold Its Shape
Cream cheese frosting is delicious but delicate, and sometimes it becomes too soft to pipe or spread properly.
Possible Causes:
- Overbeating the cream cheese—this can break down the structure.
- Using low-fat cream cheese, which has more moisture and won’t firm up as well.
- Adding too much liquid, like milk or vanilla extract.
Solutions:
- Use full-fat cream cheese, not the spreadable kind in tubs.
- Beat butter first, then add cream cheese for better consistency.
- Refrigerate the frosting for 10-15 minutes before piping if it’s too soft.
5. Cupcakes Stick to the Liners
Nothing is more frustrating than peeling off the cupcake liner and having half the cupcake stick to it.
Possible Causes:
- The cupcakes weren’t fully cooled before peeling.
- Low-fat batter can stick more.
- Using cheap or thin liners that absorb too much moisture.
Solutions:
- Let the cupcakes cool completely before peeling the liners.
- Use high-quality parchment cupcake liners.
- Lightly spray liners with non-stick spray before filling them.
How to Store and Freeze Red Velvet Cupcakes
Short-Term Storage (1-2 Days)
If you plan to eat the cupcakes within 1-2 days, store them at room temperature in an airtight container.
- Keep them in a cool, dry place away from direct sunlight.
- Avoid refrigerating frosted cupcakes unless necessary, as the fridge can dry them out.
Refrigerating Red Velvet Cupcakes (Up to 5 Days)
For longer storage, refrigeration is best, especially if they are frosted with cream cheese.
- Store in an airtight container to prevent drying.
- If stacking, place a sheet of wax paper between layers.
- Let the cupcakes come to room temperature before serving for the best texture.
Freezing Red Velvet Cupcakes (Up to 3 Months)
Red velvet cupcakes freeze extremely well, making them perfect for advance preparation.
How to Freeze Unfrosted Cupcakes:
- Let the cupcakes cool completely before freezing.
- Wrap each cupcake individually in plastic wrap to prevent freezer burn.
- Place them in a ziplock freezer bag or airtight container.
How to Freeze Frosted Cupcakes:
- Freeze the frosted cupcakes on a baking sheet for 1 hour to set the frosting.
- Once the frosting is firm, wrap cupcakes individually in plastic wrap.
- Store in an airtight container for up to 3 months.
Thawing Instructions:
- Unfrosted cupcakes can thaw at room temperature for 30 minutes.
- Frosted cupcakes should be moved to the fridge overnight, then left at room temperature for 15 minutes before serving.
Frequently Asked Questions About Red Velvet Cupcakes
1. Can I Make Red Velvet Cupcakes Without Food Coloring?
Yes! Use beet juice or beet powder for a natural red hue. The color will be less intense but still beautiful.
2. What’s the Best Way to Make Mini Red Velvet Cupcakes?
Simply reduce the baking time to 10-12 minutes at 350°F. Use a mini muffin pan and small liners.
3. Can I Use Yogurt Instead of Buttermilk?
Yes! Use ¾ cup plain yogurt mixed with ¼ cup milk as a substitute.
4. Why Do My Cupcakes Taste Bitter?
Too much baking soda or artificial red food coloring can cause bitterness. Always use quality ingredients.
5. How Do I Get a More Vibrant Red Color?
Use gel or powdered food coloring instead of liquid. Also, make sure you use natural cocoa powder to avoid darkening the batter.
Final Thoughts – Mastering the Art of Red Velvet Cupcakes
Baking red velvet cupcakes is both a science and an art, requiring the right balance of ingredients, proper technique, and a bit of patience. Whether you stick to the classic recipe or experiment with fun variations, these cupcakes are guaranteed to be a crowd-pleaser.
By following these troubleshooting tips, storage solutions, and expert baking strategies, you’ll be able to create flawless, bakery-quality red velvet cupcakes every time. So, grab your mixing bowl, whip up a batch, and enjoy the magic of this iconic dessert!