Soft Pretzels
There’s something magical about biting into a freshly baked homemade soft pretzel—its warm, golden crust giving way to a soft, chewy center. A beloved snack worldwide, the soft pretzel has a rich history and an irresistible appeal. Whether it’s a classic salted pretzel served with mustard, a sweet cinnamon sugar version, or a stuffed pretzel bursting with cheese, this iconic treat never fails to delight.
Making soft pretzels at home may seem daunting, but it’s surprisingly simple and immensely rewarding. By following the right techniques and using basic pantry ingredients, you can create bakery-quality pretzels in your own kitchen. From the satisfaction of shaping the dough into the signature twist to the transformative process of boiling and baking, homemade soft pretzels are a joy to make and share.
This guide takes you step by step through the process of preparing the perfect soft pretzels, covering everything from their history and unique characteristics to the tools and ingredients you’ll need. Let’s dive into the art of making soft pretzels—a delicious journey that’s sure to become a favorite in your baking repertoire.
What Are Soft Pretzels?
Soft pretzels are a type of bread characterized by their chewy texture, shiny golden crust, and distinctive twisted shape. Unlike hard pretzels, which are baked longer for a crunchy texture, soft pretzels are tender and pliable, making them perfect for dipping into sauces or enjoying on their own.
Key Characteristics of Soft Pretzels:
- Chewy Texture: Achieved through a combination of a high-gluten dough, a baking soda bath, and proper baking techniques.
- Golden-Brown Crust: Created by the alkaline properties of the baking soda bath, which enhances browning during baking.
- Signature Twist: The iconic shape isn’t just for aesthetics—it helps the pretzel bake evenly and hold its texture.
Soft pretzels are incredibly versatile. They can be savory or sweet, topped with salt or cinnamon sugar, and even stuffed with cheese, chocolate, or other fillings. Their universal appeal makes them a favorite at bakeries, street fairs, and now, in home kitchens.
The History of Soft Pretzels
Soft pretzels have a rich and fascinating history that spans centuries and continents.
Origins of Pretzels
- Pretzels are believed to have originated in Europe, specifically among monks in the early 7th century. Legend has it that monks created pretzels as a reward for children who recited their prayers correctly. The pretzels’ distinctive twisted shape was said to represent crossed arms in prayer.
- In Germany, pretzels became a symbol of hospitality and prosperity, often featured in religious celebrations and festivals.
The Evolution of Soft Pretzels
- While traditional German pretzels were often firm and crusty, softer versions emerged over time, catering to a growing preference for tender, doughy textures.
- In the 19th and 20th centuries, German immigrants brought pretzels to the United States, where soft pretzels gained immense popularity, particularly in cities like Philadelphia. Today, they’re a staple at sporting events, fairs, and bakeries across the country.
Why You’ll Love Homemade Soft Pretzels
Homemade soft pretzels offer several advantages over store-bought or frozen varieties:
1. Unmatched Freshness
- Freshly baked soft pretzels are warm, aromatic, and far superior in flavor and texture to pre-packaged options.
2. Customizable to Your Taste
- From sweet to savory, the flavor possibilities are endless. You can experiment with toppings, fillings, and even the dough itself.
3. Fun and Interactive
- Shaping pretzels is a hands-on activity that’s perfect for kids and adults alike. It’s a fun way to involve the whole family in baking.
4. Simple Ingredients, Big Flavor
- Soft pretzels are made with basic pantry staples, proving that great taste doesn’t require complex ingredients.
5. Cost-Effective
- Making pretzels at home is much more affordable than buying them at a bakery or concession stand, especially if you’re making them in larger batches.
Health Benefits of Homemade Soft Pretzels
Homemade soft pretzels can be a wholesome snack or treat, depending on how you customize them. Here’s why they can be a healthier option:
1. Control Over Ingredients
- By making pretzels at home, you can use high-quality ingredients and avoid preservatives or artificial flavors found in commercial products.
2. Customizable Nutrition
- Adjust the recipe to suit your dietary needs. For example, you can use whole-grain flour for added fiber or reduce the salt for a low-sodium version.
3. Energy Boost
- Pretzels are rich in carbohydrates, making them a great snack for sustained energy. Pair them with a protein-rich dip like peanut butter or cheese sauce for a balanced treat.
Ingredients Overview
Soft pretzels rely on a handful of simple ingredients, each playing a crucial role in the recipe.
Core Ingredients:
- Flour:
- All-purpose flour is a versatile option, but bread flour is preferred for its higher protein content, which creates a chewier texture.
- Yeast:
- Active dry yeast or instant yeast is used to leaven the dough, giving the pretzels their soft, airy structure.
- Warm Water:
- Essential for activating the yeast and hydrating the dough.
- Salt:
- Adds flavor to the dough and balances the sweetness.
- Sugar:
- A small amount of sugar feeds the yeast, helping the dough rise.
- Butter:
- Provides richness and tenderness to the dough.
- Baking Soda:
- Used in the boiling step to achieve the pretzels’ signature chewy texture and golden crust.
- Coarse Salt:
- Classic pretzels are topped with coarse salt for a burst of flavor and a traditional appearance.
Optional Ingredients:
- Sweeteners:
- Replace sugar with honey or brown sugar for a unique flavor profile.
- Spices and Herbs:
- Add garlic powder, onion powder, or dried herbs for a savory twist.
- Toppings:
- Beyond coarse salt, try sesame seeds, poppy seeds, shredded cheese, or cinnamon sugar.
- Fillings:
- Stuff pretzels with cheese, chocolate, or even cream cheese for an indulgent treat.
Essential Tools and Equipment
To make perfect soft pretzels, you’ll need a few basic tools:
- Mixing Bowls:
- For combining and proofing the dough.
- Stand Mixer (Optional):
- Speeds up the kneading process, but the dough can also be kneaded by hand.
- Baking Sheet and Parchment Paper:
- Prevents sticking and ensures even baking.
- Pot for Boiling:
- Used to prepare the baking soda bath.
- Slotted Spoon:
- Makes it easy to lift the pretzels out of the boiling water.
- Kitchen Scale:
- For precise dough portioning, ensuring uniformly shaped pretzels.
Preparation Tips for Homemade Soft Pretzels
- Activate the Yeast:
- Use warm water (105-110°F) to activate the yeast. If the water is too hot, it can kill the yeast; if it’s too cold, the yeast won’t activate.
- Knead Thoroughly:
- Knead the dough for 8-10 minutes by hand or 5-7 minutes with a stand mixer. A well-kneaded dough will be smooth, elastic, and slightly tacky.
- Let the Dough Rise:
- Allow the dough to rise in a warm place for 1-2 hours, or until it has doubled in size. Cover the bowl with a damp towel to prevent the dough from drying out.
- Shape with Care:
- Roll the dough into long ropes (about 18-24 inches) and twist into the classic pretzel shape. Don’t worry if your first few attempts aren’t perfect—practice makes perfect!
- Baking Soda Bath:
- Boil each pretzel in a mixture of water and baking soda for 30-60 seconds. This step is crucial for achieving the pretzel’s chewy texture and shiny crust.
- Bake to Perfection:
- Preheat your oven to 425°F (220°C) and bake the pretzels for 12-15 minutes, or until golden brown. Rotate the baking sheet halfway through for even baking.
Cooking Techniques for Homemade Soft Pretzels
Making soft pretzels at home involves a few key techniques that ensure they achieve their signature texture, flavor, and appearance. These steps, from shaping to baking, are straightforward but require attention to detail for the best results.
1. The Baking Soda Bath: The Secret to Chewy, Golden Pretzels
The baking soda bath is one of the most important steps in making soft pretzels. It gives pretzels their characteristic shiny, golden-brown crust and chewy texture. Here’s why it works and how to do it right:
- Why a Baking Soda Bath?
- The alkaline nature of baking soda raises the pH of the dough’s surface, promoting Maillard browning during baking. This is what gives pretzels their distinctive color and flavor.
- Boiling also pre-cooks the outer layer of the pretzel, creating the chewy texture.
- How to Prepare the Bath:
- Use a ratio of 8 cups of water to 2/3 cup of baking soda.
- Bring the water to a gentle boil, ensuring the baking soda dissolves completely.
- Drop each shaped pretzel into the boiling water for 30-60 seconds. Flip halfway through for even exposure.
- Pro Tips:
- Avoid overcrowding the pot—boil 1-2 pretzels at a time for best results.
- Use a slotted spoon to carefully transfer the pretzels from the bath to a baking sheet.
2. Shaping the Perfect Pretzel
The iconic pretzel shape might seem intimidating, but with a little practice, it’s easy to master.
- Steps for Shaping:
- Divide the dough into equal portions (about 2-3 ounces each for standard pretzels).
- Roll each portion into a rope about 18-24 inches long.
- Form a “U” shape with the rope, cross the ends over each other twice, and press them down onto the bottom curve of the “U.”
- Transfer the shaped pretzels to a parchment-lined baking sheet.
- Tips for Success:
- Keep the surface lightly floured to prevent sticking while rolling.
- If the dough resists stretching, let it rest for a few minutes to relax the gluten.
3. Baking to Perfection
Once the pretzels are shaped and boiled, they’re ready for the oven. Baking transforms them from doughy twists to golden, chewy delights.
- Steps for Baking:
- Preheat your oven to 425°F (220°C). A hot oven is crucial for even browning and a crisp crust.
- Place the pretzels on a parchment-lined baking sheet, leaving enough space for them to expand.
- Brush each pretzel with an egg wash (1 beaten egg mixed with 1 tablespoon of water) to enhance browning and add a shiny finish.
- Sprinkle coarse salt, sesame seeds, or your preferred toppings before baking.
- Bake for 12-15 minutes, or until the pretzels are golden brown. Rotate the baking sheet halfway through for even cooking.
- Pro Tip:
- For extra-crispy pretzels, bake for an additional 1-2 minutes, but keep a close eye to avoid burning.
Flavor Variations for Homemade Soft Pretzels
One of the best parts of making soft pretzels at home is the ability to customize them. From savory to sweet, the possibilities are endless. Here are some creative ideas to try:
1. Classic Salted Soft Pretzels
- Topping: Sprinkle coarse salt after the egg wash for a traditional flavor.
- Serving Suggestions: Pair with mustard, beer cheese dip, or a creamy ranch dressing.
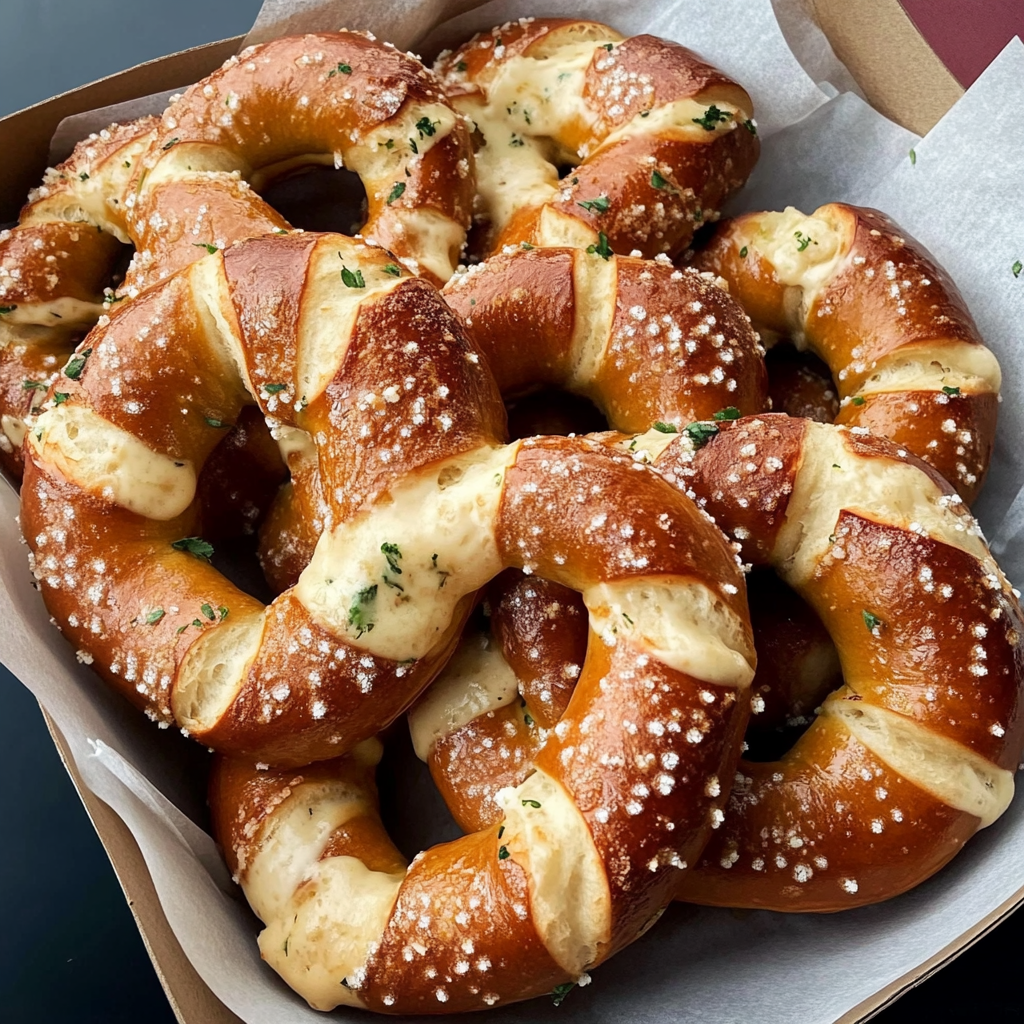
2. Garlic Parmesan Pretzels
- Topping: Brush the baked pretzels with melted garlic butter and sprinkle with grated Parmesan cheese.
- Serving Suggestions: Serve with marinara sauce or a garlic aioli for dipping.
3. Cinnamon Sugar Pretzels
- Topping: After baking, brush the pretzels with melted butter and toss them in a cinnamon-sugar mixture.
- Serving Suggestions: Dip in cream cheese frosting or a vanilla glaze for a dessert-like treat.
4. Cheese-Stuffed Pretzels
- Preparation: Flatten each portion of dough into a rectangle, place shredded cheese in the center, and seal the edges before shaping into a pretzel.
- Topping: Sprinkle with additional cheese before baking.
- Serving Suggestions: Enjoy on their own or with a warm cheese dip.
5. Everything Bagel Pretzels
- Topping: Sprinkle a mix of sesame seeds, poppy seeds, dried garlic, dried onion, and coarse salt (everything bagel seasoning) onto the pretzels before baking.
- Serving Suggestions: Pair with a creamy herb dip or smoked salmon spread.
6. Spicy Jalapeño Pretzels
- Preparation: Add diced jalapeños to the dough or sprinkle them on top along with shredded cheddar cheese.
- Serving Suggestions: Serve with a spicy queso dip or sour cream.
7. Chocolate Drizzle Pretzels
- Topping: Drizzle melted dark or white chocolate over the baked pretzels.
- Serving Suggestions: Perfect as a dessert or gift for chocolate lovers.
8. Herb and Olive Pretzels
- Preparation: Mix fresh herbs (like rosemary or thyme) and chopped olives into the dough before shaping.
- Topping: Brush with olive oil and sprinkle with sea salt.
- Serving Suggestions: Serve with hummus or a balsamic glaze.
Pairing Suggestions for Soft Pretzels
Soft pretzels are incredibly versatile and can be served with a variety of dips, sides, and beverages. Here are some pairing ideas to enhance your pretzel experience:
1. Dips and Sauces
- Classic Mustard Dips:
- Yellow mustard, spicy brown mustard, or honey mustard.
- Cheese-Based Dips:
- Warm beer cheese, queso, or a sharp cheddar fondue.
- Sweet Dips:
- Cream cheese frosting, chocolate ganache, or caramel sauce.
- Savory Dips:
- Spinach artichoke dip, garlic aioli, or marinara sauce.
2. Beverages
- For Savory Pretzels:
- Pair with a cold beer, cider, or sparkling water.
- For Sweet Pretzels:
- Serve with hot chocolate, chai tea, or a vanilla milkshake.
3. Sides and Meals
- Soup Pairings:
- Pretzels are a natural partner for creamy soups like broccoli cheddar, beer cheese soup, or tomato bisque.
- Charcuterie Boards:
- Include mini pretzels alongside cured meats, cheeses, and fruits for a stunning platter.
Storing Homemade Soft Pretzels
To ensure your soft pretzels stay fresh and delicious, proper storage is key. Whether you’re saving leftovers or preparing a batch ahead of time, follow these steps to maintain their texture and flavor.
Short-Term Storage (Room Temperature)
- Cooling Down Completely:
- Allow the pretzels to cool completely before storing them. Placing warm pretzels in a container can create condensation, leading to soggy textures.
- Use Airtight Containers:
- Store pretzels in an airtight container or resealable plastic bag to prevent them from drying out.
- Best for Immediate Consumption:
- Pretzels stored at room temperature are best enjoyed within 1-2 days for maximum freshness.
Long-Term Storage (Refrigeration)
- How to Refrigerate Pretzels:
- Wrap each pretzel individually in plastic wrap or foil, then place them in an airtight container.
- Shelf Life:
- Pretzels can be stored in the refrigerator for up to 3 days, but they may lose some of their softness over time.
Freezing Soft Pretzels
For long-term storage, freezing is an excellent option. Properly frozen pretzels can maintain their flavor and texture for weeks.
- Individually Wrap Pretzels:
- Wrap each pretzel tightly in plastic wrap or aluminum foil to prevent freezer burn.
- Store in Freezer Bags or Containers:
- Place the wrapped pretzels in a heavy-duty freezer bag or airtight container. Label with the freezing date for easy tracking.
- Shelf Life:
- Frozen pretzels can last up to 2 months in the freezer.
Reheating Soft Pretzels
Reheating soft pretzels the right way is crucial to restoring their soft, chewy texture and warm, fresh-baked flavor.
1. Oven Method (Best for Freshness)
- Steps:
- Preheat the oven to 350°F (175°C).
- Place the pretzels on a baking sheet and cover loosely with foil to prevent drying out.
- Heat for 5-7 minutes or until warm.
- Why It Works:
- The oven method evenly reheats the pretzels, restoring their softness and lightly crisping the crust.
2. Microwave Method (Quickest Option)
- Steps:
- Place the pretzel on a microwave-safe plate.
- Cover it with a damp paper towel to retain moisture.
- Heat on medium power in 15-20 second intervals until warm.
- Caution:
- Overheating can make the pretzel rubbery, so check frequently.
3. Air Fryer Method (For a Crisp Finish)
- Steps:
- Preheat the air fryer to 350°F (175°C).
- Place the pretzel in the air fryer basket.
- Heat for 3-5 minutes, checking for desired crispness.
- Why It Works:
- This method quickly reheats the pretzels while restoring some crispiness to the crust.
4. Toaster Oven Method (Convenient and Effective)
- Steps:
- Preheat the toaster oven to 325°F (165°C).
- Place the pretzel on a small tray and heat for 5-6 minutes.
- Why It’s Great:
- Ideal for reheating a single pretzel without using a full-sized oven.
Creative Uses for Leftover Soft Pretzels
If you find yourself with leftover pretzels, transform them into new and exciting dishes.
1. Pretzel Croutons
- How to Make Them:
- Slice leftover pretzels into small cubes, toss with olive oil and seasoning, and bake at 350°F (175°C) until crispy.
- Uses:
- Add to salads, soups, or snack mixes for a crunchy twist.
2. Pretzel Bread Pudding
- How to Make It:
- Tear pretzels into pieces and soak them in a mixture of eggs, milk, sugar, and vanilla. Bake until golden and set.
- Flavor Options:
- Add raisins, cinnamon, or chocolate chips for extra indulgence.
3. Pretzel Breakfast Sandwiches
- How to Make Them:
- Slice a pretzel in half and use it as a bun for breakfast sandwiches with eggs, cheese, and bacon or sausage.
- Why It’s Great:
- A hearty, satisfying breakfast that makes use of leftover pretzels.
4. Pretzel Dippers for Cheese Fondue
- How to Use Them:
- Cut leftover pretzels into bite-sized pieces and serve as dippers for warm cheese fondue or queso.
5. Pretzel Crust for Dishes
- How to Make It:
- Crush pretzels into fine crumbs and use them as a crust for chicken tenders, fish fillets, or even desserts like cheesecake.
Common Mistakes to Avoid When Making Soft Pretzels
Even seasoned bakers can encounter challenges with pretzel-making. Here are some common mistakes and how to avoid them:
1. Over-Boiling in the Baking Soda Bath
- The Issue:
- Leaving pretzels in the boiling water for too long can make them overly dense and affect their texture.
- Solution:
- Stick to 30-60 seconds per pretzel for optimal results.
2. Underproofing the Dough
- The Issue:
- If the dough hasn’t risen enough, the pretzels may be dense and lack fluffiness.
- Solution:
- Allow the dough to double in size during the first rise, and give the shaped pretzels a short resting time before boiling.
3. Uneven Baking
- The Issue:
- Pretzels that aren’t evenly baked may have raw or overly browned spots.
- Solution:
- Rotate the baking sheet halfway through baking for even heat distribution.
4. Skipping the Egg Wash
- The Issue:
- Without the egg wash, pretzels may not achieve the golden-brown crust that’s characteristic of soft pretzels.
- Solution:
- Always brush the pretzels with an egg wash before baking for a glossy finish.
5. Not Preheating the Oven
- The Issue:
- A cold oven can lead to uneven baking and longer cooking times.
- Solution:
- Preheat the oven to 425°F (220°C) before baking the pretzels.
FAQs About Homemade Soft Pretzels
1. Can I Make Pretzel Dough Ahead of Time?
- Yes! After the first rise, refrigerate the dough for up to 24 hours. Let it come to room temperature before shaping and boiling.
2. Can I Freeze Unbaked Pretzels?
- Absolutely! Shape the pretzels, freeze them on a baking sheet, then transfer to a freezer bag. Boil them directly from frozen when ready to bake.
3. Why Are My Pretzels Too Dense?
- This could be due to under-kneading, insufficient rising time, or over-boiling. Ensure proper dough development and follow boiling times carefully.
4. Can I Use Gluten-Free Flour?
- Yes, but the texture may vary. Use a gluten-free bread flour blend for the best results.
5. What Toppings Work Besides Salt?
- Pretzels are highly customizable. Try sesame seeds, poppy seeds, shredded cheese, cinnamon sugar, or even chopped nuts.
Conclusion
Homemade soft pretzels are a timeless snack that offers endless customization options, making them perfect for any occasion. Whether you’re enjoying them fresh out of the oven, reheating them for later, or turning leftovers into creative dishes, the possibilities are as satisfying as the pretzels themselves. With a few key techniques and thoughtful storage tips, you’ll master the art of pretzel-making in no time!